Originally dubbed "Fifi Mosaik", polymer clay was developed by a German dollmaker named Fifi Rehbinder in the 1930's, who used it to sculpt doll heads. In 1964 Eberhard Faber purchased the formula from Fifi Rehbinder, and manufactured it under the brand Fimo. It was marketed and distributed to toy stores as a medium for sculpting dollhouse miniatures.
It first debuted in the United States in the 1970's, when a family German immigrants named Shaups began importing Fimo clay for friends and neighbors that were intrigued by their clay creations in 1975. Soon after, American companies began to market and sell similar products.
Several American inventors had also discovered similar vinyl clays in the 1950's and 1960's, including Gordon Swenarton, whose father was a chemist, and a company called Zenith Products, developer of polyform products. The original intention of polyform products was to create a thermal transfer compound. When that failed, it was thought to have potential in the arts and crafts market.
Popularized in the 1990's, there are several American distributers of polymer clay in existence today. It is still used for dollhouse miniatures, and is also used for creating polymer clay canes, used decorate object surfaces or create unique beads. It has also found use for creating sculptures and figurines.
Tuesday, May 31, 2016
Sunday, May 15, 2016
Polymer Clay Cane Videos
This craft obviously evolved much later than the sixties. Polymer clay is basically a moldable type of plastic that you bake in the oven to harden. It comes in a wide varieties of colors.
Polymer clay canes were inspired by the milifiori techniques of Venician glass makers. A picture is created in the form of a long rod, known as a cane, that can be sliced in such a way that the picture is the same throughout. Using this technique, many beads can be formed, or cane slices can be used to decorate other objects.
Here, I offer two free videos, each demonstrating a technique to create a simple polymer clay cane that can be sliced into beads, or sliced to create broaches, or sliced thinly to cover the surface of another object, such as a small tin.
Polymer Clay Jelly Roll Cane
Polymer Clay Bullseye and Lace Cane
Tuesday, May 10, 2016
Square Knot Tutorial
Macramé Square Knot Tutorial
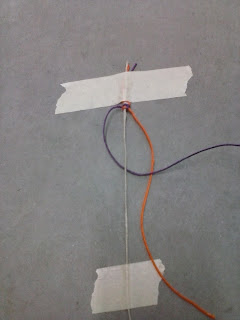
- You will need three pieces of hemp twine or parachute cord to commence. Begin by tying a simple, ordinary overhand knot near the top, leaving a slight gap from the end. The center cord is the filler cord, and the two outer cords are your working cords.
- Tape down at least one end of te filler cord behind the overhand knot. Both ends of the filler cord can be taped to make this knot easier.
- Take the string on the right, and pass it under the filler cord. (See Figure A)

Figure A - Pass it over the cord to the left of the filler cord. (See Figure B)

Figure B - Bring the left working cord over the filler cord and through the loop created by the right hand working cord. (See figure C)
- Pull the working cords tight slowly and evenly, keeping even tension on the filler cord as well, which can be taped on both ends for support. You have now completed one half of the square knot.
- Start with the cord on the left hand side, now, and bring it under the filler cord. (See figure D)

Figure D - Place it over the cord on the right. (See Figure E)

Figure E - Bring the cord on the right over the filler cord and through the loop created by the cord on the left. (See Figure F)

Figure F - Gently and slowly pull the knot tight, keeping and even tension on all three cords.
- You have now completed one square knot. Next, you will begin again with the cord on the right. Continue alternating starting cords untill you have reached your project length.
 |
| Figure C |
Monday, May 9, 2016
Double Half Hitch Knot
Doube Half Hitch Knot
- To make the double half hitch knot, you will need at least three pieces of hemp twine: one filler cord, and two working cords.
- Start by forming an overhand knot at one end with all three cords.
- Tape the work down at this end. (Filler cord can be taped at the opposite end, but this is optional.)
- Pass the working cord on the right under the filler cord. (Please consult figure 1)

Figure 1 - Next, weave it over the cord to the left. (Consult Figure 2)

Figure 2 - Place the left hand cord over the filler cord from left to right, and through the loop that the right hand cord created. (Please observe Figure 3)

Figure 3 - Gently and slowly pull each cord end evenly to tighten.
- Repeat, starting with the cord on the right side again until desired project length. This knot will create a double helix shape.
Subscribe to:
Comments (Atom)